Customize Outlook and suddenly your inbox feels less like chaos and more like home. The default setup works; but let’s be honest, it’s not built for your style of working. Too many buttons you never touch, layouts that hide what you actually need, and a cluttered feel that slows you down.
The good news? Outlook gives you plenty of options to make it your own. From tweaking the layout and themes to adjusting features that fit your workflow, you can turn it into a tool that actually works the way you do.
Outlook is one of the most used email tools worldwide. But out of the box, it may not be set up to match your habits. Some people like a clean inbox with no sidebars. Others want everything visible; calendar, tasks, and folders. Some need extra tools for meetings and reminders. Outlook gives many options, but most people don’t explore them.
When Outlook is set up your way, you can finish email work faster and avoid distractions. You stop wasting time searching for buttons or messages. You also lower the chances of missing important emails. That’s why even small layout changes can help a lot. You can save clicks, reduce eye strain, and focus better.
Default Customize Outlook Layout Overview
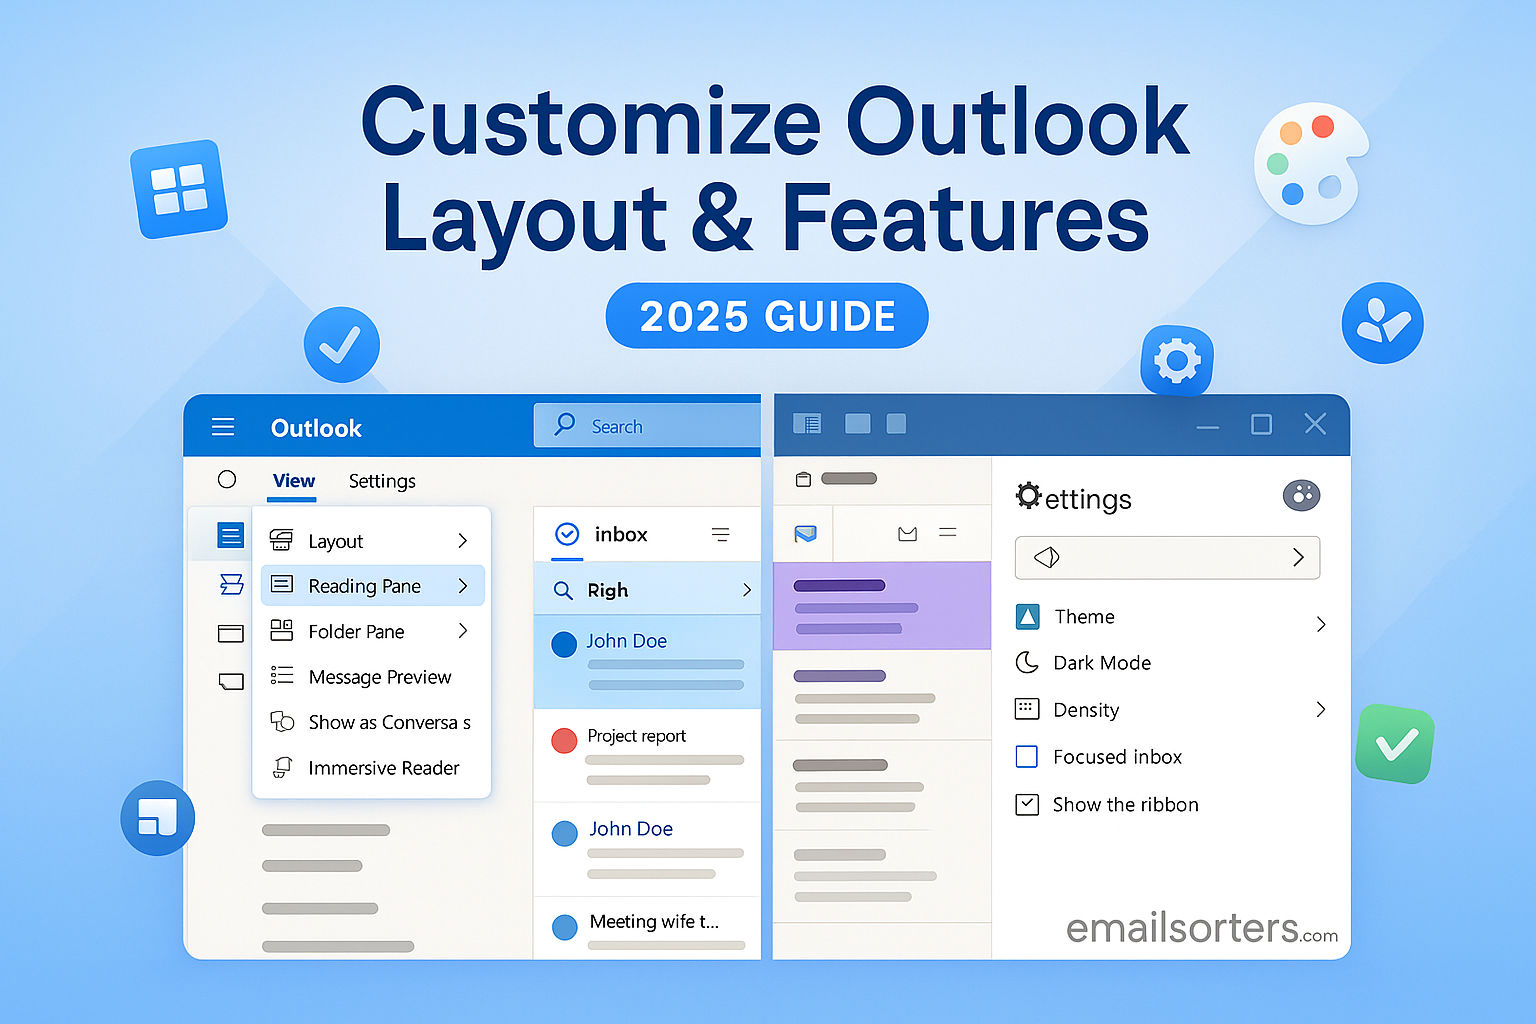
When you first open Outlook, it shows a basic layout. On the left, there’s the folder pane. In the middle, you see your emails. On the right, you might have the reading pane or calendar. At the top, there’s the ribbon with tabs like Home, View, and File. The layout works fine for general use, but it might not fit your workflow.
For example, the reading pane might feel too narrow. Or maybe you don’t use the Focused Inbox feature and want to turn it off. Outlook lets you adjust all this. Before jumping into deep customizations, it helps to know where everything is and what each section does.
Accessing the Customization Settings
How to Open Outlook Settings Panel
To change the layout or features in Outlook, you need to open the settings. In the desktop app, go to the File tab at the top-left corner. Then click on Options. This opens the Outlook Options window where most custom settings live.
For layout tweaks like reading pane and folder pane, use the View tab on the ribbon. Click View Settings or Reading Pane to begin making changes. If you’re using Outlook on the web, click the gear icon in the top-right corner. A settings pane will slide out with different layout and feature options.
Overview of Layout and Features Settings
Outlook splits its settings into categories. Under the General section, you’ll find themes, notifications, and sound. Mail lets you change message handling, spelling, and compose options. Calendar, People, and Tasks each have their own layout controls.
In the Customize Ribbon section, you can add, move, or remove commands. You can also build new tabs. Quick Access Toolbar lets you place shortcuts at the top of the screen. These shortcuts work even when other tabs are open.
Understanding where settings live saves time. Instead of hunting around, you’ll know whether to go to the View tab or the Options window. This makes customizing Outlook less frustrating and more useful.
Personalizing the Outlook Interface
Changing the Reading Pane Position
The reading pane shows your email’s content without opening it in a new window. You can set this pane to appear on the right, bottom, or hide it. Each view changes how much space you get for messages and how you read them.
To change this, go to the View tab, then click on the Reading Pane. You’ll see three options: Right, Bottom, and Off. Right is best if you want to scan emails quickly. Bottom works well on smaller screens. Turning it off gives you more room for your email list but slows down how fast you can view content.
Your choice depends on how you work. If you read full emails before replying, the Bottom view might help. If you skim and respond fast, the Right view can save you clicks. Try each one and pick what feels best.
Adjusting Message Preview Options
Outlook lets you control how many lines of each email show in the list view. You can show one, two, or three lines. This is called Message Preview. It helps you scan messages faster without opening them.
To adjust this, go to the View tab, then click Message Preview. Choose how many lines you want. If you only need to see the subject, one line is enough. For more context, choose two or three.
This small change affects your reading speed. With more preview lines, you can decide faster whether an email needs action. It also reduces the time spent clicking through unnecessary messages.
Choosing Between Focused and Other Inbox
Outlook includes a Focused Inbox that splits your email into two tabs: Focused and Other. Focused holds what Outlook thinks is important. Others hold the rest. Some find it helpful, others find it confusing.
To turn this on or off, go to the View tab and click Show Focused Inbox. If you don’t see the tab switch above your email list, it means the feature is off. Turning it off shows all emails in one list again.
Focus modes can hide important emails by mistake. If that happens often, it’s better to turn off Focused Inbox. If you get a lot of newsletters or social updates, it might help you focus on real work emails.
Organizing the Folder Pane
Pinning and Removing Folders
The folder pane shows your mailboxes, including Inbox, Sent, Drafts, and custom folders. You can pin folders to the Favorites section at the top or remove ones you don’t use. This clears clutter and speeds up your work.
To pin a folder, right-click it and choose Add to Favorites. To remove one, right-click it under Favorites and choose Remove from Favorites. This doesn’t delete the folder, just removes the shortcut.
Keep only folders you use daily in Favorites. This might be Inbox, Sent, and a project folder. For rare folders, leave them in the full list to the side. Your goal is to scroll less and click faster.
Reordering Mail Folders
Folders appear in the order you created them. But in Favorites, you can drag and drop them into any order. This way, your most used folders come first.
Just click and hold a folder in Favorites, then move it up or down. For example, put your Inbox at the top, followed by your Work and Personal folders. This manual order stays even after restarting Outlook.
Putting folders in a useful order saves seconds every time you switch tasks. Over time, that adds up. You also reduce the chance of dragging an email to the wrong folder.
Customizing the Ribbon and Toolbar
How to Add or Remove Commands
The ribbon at the top of Outlook contains tabs with buttons for different actions. You can add, remove, or rearrange these commands to suit your needs. To do this, open Outlook, then click File > Options > Customize Ribbon. On the right side, you’ll see the current ribbon layout. On the left, there’s a list of available commands.
Pick a tab you want to change; like Home or View. Then select a command from the left and click “Add” to place it in the tab. To remove one, highlight it on the right and click “Remove.” You can also create new groups inside tabs and fill them with commands you often use.
This makes your work faster. For example, if you regularly mark emails as unread or delay delivery, adding these buttons to your ribbon saves time. There’s no need to go digging through menus when everything’s right there in front of you.
Creating Custom Tabs
Beyond editing existing tabs, you can build your own from scratch. This is helpful if your workflow involves tasks that Outlook doesn’t group together. To create a new tab, go back to File > Options > Customize Ribbon and click “New Tab.”
Name the tab something that makes sense, like “My Tools” or “Quick Actions.” Then create new groups under it, such as “Email Tasks” or “Calendar Shortcuts.” Drag commands from the left and drop them into these groups.
Custom tabs give you a personalized space in Outlook. It’s like setting up a workstation where every tool is right where you expect it. This kind of control helps reduce friction during the workday.
Resetting the Ribbon to Default
Sometimes, too much customization becomes confusing. Maybe you added too many commands or rearranged things in a way that no longer feels useful. In that case, Outlook lets you reset the ribbon to its default setup.
Go to File > Options > Customize Ribbon, and click “Reset” at the bottom right. You can reset only the selected tab or the entire ribbon. If you’ve saved your layout somewhere, you can re-import it later. But if not, this brings back the original Outlook ribbon.
This is helpful when you’re starting over or switching to a new device. It clears the clutter and brings you back to a known, stable setup.
Calendar View Adjustments
Switching Between Day, Week, and Month Views
The calendar in Outlook supports multiple layouts. You can view your schedule by the day, work week, full week, or entire month. To switch views, click the Calendar icon at the bottom, then use the toolbar in the top-right corner to choose your view.
Day view is useful when your schedule is packed. Work Week focuses only on weekdays, while Week shows all seven days. Month view gives you a big-picture view of your tasks and appointments. You can also toggle between one calendar or multiple side-by-side calendars.
Pick the layout that fits your role. If you have frequent meetings, the daily or weekly views make sense. If you plan across weeks, the month view will serve you better. Outlook remembers your last view and reopens it next time.
Adding and Managing Calendars
You can manage multiple calendars in Outlook. There’s your default one, but you can also add calendars for work, personal, holidays, or shared team events. To add a calendar, go to the Calendar tab, then click Add Calendar > Create New Blank Calendar or choose from other sources like the internet or shared calendars.
You can color-code each calendar to make it easy to distinguish them. You can also overlay calendars to see everything in one timeline. To do that, check multiple calendars in the left pane, then click the arrow on one to overlay it with the other.
This helps keep your schedule clear. You won’t book a work call during a personal event or miss a team meeting because it was on a shared calendar you forgot to check.
Personalizing Email Settings
Changing Fonts and Colors for Messages
If the default text style in Outlook doesn’t suit your needs, you can change it. Go to File > Options > Mail > Stationery and Fonts. Here, you can change fonts for new messages, replies, and plain-text messages. You can also pick colors for text and background.
Choose fonts that are easy to read and look professional. Avoid bright colors or small fonts unless you’re using a high-resolution screen. Consistent formatting helps your emails look clean and readable.
This kind of personalization also helps those with vision issues. Larger fonts and better contrast can make a big difference in readability.
Creating and Editing Email Signatures
An email signature appears at the bottom of your messages. To create one, go to File > Options > Mail > Signatures. Click “New” and type your name, title, phone number, and any legal or company disclaimers.
You can create different signatures for new emails and replies. You can also assign different signatures to each email account if you manage more than one in Outlook.
Well-written signatures save time and give your messages a professional touch. You won’t have to type your info repeatedly, and your recipients will know how to contact you.
Managing Notifications and Alerts
Configuring Desktop Alerts
Outlook shows a pop-up when you get a new email. This is called a desktop alert. To adjust it, go to File > Options > Mail, and scroll to the “Message Arrival” section. You can turn alerts on or off, and decide whether to play a sound.
Too many alerts can be distracting, especially if you get dozens of emails per hour. If that’s the case, turn them off. If you’re waiting for an important message, turn them on temporarily. You can also use rules to show alerts only for emails from specific senders.
Alerts should help you, not interrupt you. Adjusting these settings lets you stay focused.
Turning Sounds On or Off
Outlook can play a sound when new mail arrives. This setting is also under File > Options > Mail. You can enable or disable it depending on your needs.
Some people like the alert sound because it helps them notice new messages while multitasking. Others find it annoying, especially in quiet offices. Choose what helps you most.
You can also customize the sound by going to your system’s sound settings and changing the default mail notification. This gives you control over how Outlook fits into your work environment.
Customizing the To-Do Bar
Showing or Hiding Tasks and Calendar
The To-Do Bar in Outlook is a side panel that shows your calendar, tasks, and flagged emails. It’s helpful for quick access, especially if you’re juggling meetings and task deadlines. To turn it on or off, go to the View tab, then select To-Do Bar. From the dropdown, choose Calendar, Tasks, People, or turn it Off.
This panel sits on the right side of your Outlook window. If your screen is small, it might feel cramped. But on a wide display, it keeps useful tools within reach. You can view your next meeting without switching to the Calendar tab, or keep an eye on flagged tasks without opening the Tasks pane.
Use the To-Do Bar to keep reminders in sight. If you’re someone who forgets what’s next after reading emails, the To-Do Bar becomes a daily helper. It shortens your workflow by keeping everything visible in one place.
Managing the Layout of the To-Do Bar
Once the To-Do Bar is visible, you can change what shows up and how it’s ordered. You can resize the bar by dragging its edge. You can also reorder sections inside it; for example, putting Tasks above Calendar or hiding the People section if you don’t use it.
Right-clicking inside the bar gives you options to pin or unpin parts. You can also adjust how many upcoming calendar events are shown. Some users prefer a clean setup with just a list of today’s tasks, while others may want a broader view that includes meetings and contact shortcuts.
This small panel packs a lot of power when customized well. It helps bring more structure to your workday without adding complexity. You get a quick daily summary with fewer clicks.
Using Add-ins and Extensions
Installing Outlook Add-ins
Add-ins extend what Outlook can do. These tools add new features or connect Outlook with other apps. You can find them by clicking Home > Get Add-ins. A window will open with a store showing popular options like Trello, Zoom, Salesforce, and more.
Click an add-in to read details and reviews, then click Add to install. Some are free, others need a subscription. Once installed, most add-ins show up in your ribbon or message window.
Pick add-ins based on what you do often. If you join video meetings, Zoom or Teams add-ins can add meeting links with one click. If you use a task manager like Trello, the integration helps convert emails into tasks.
Managing Permissions for Add-ins
When installing add-ins, Outlook may ask for permission to access your calendar, contacts, or messages. This is normal, but you should check what data it wants and why. To manage access, go to Home > Get Add-ins > My Add-ins, then click the three dots next to any installed tool and choose Remove or Manage Permissions.
Only install tools from trusted sources. Look for reviews, and check if your organization allows third-party add-ins. If you’re unsure, talk to your IT team. Managing add-ins well means more control over what Outlook does and how it connects with other tools.
Mobile Outlook Customization
Adjusting Layout on Outlook Mobile
The mobile version of Outlook looks different, but it offers layout changes too. Tap your profile icon in the top-left corner, then choose Settings. From here, you can change swipe actions, default reply type, focused inbox setting, and calendar view.
Swipe gestures are especially helpful. You can set left swipe to delete and right swipe to archive; or pick other actions like flag, move, or mark as read. You can also turn Focused Inbox on or off if it’s splitting messages the wrong way.
These controls make Outlook easier to use with one hand. Mobile users often check emails on the go, so faster actions and simple layouts are important. Customize what feels right for how you use your phone.
Syncing Customizations Between Devices
Outlook tries to keep your settings consistent across devices, but some changes; like ribbon layout or To-Do Bar position; don’t carry over. What sync includes things like Focused Inbox status, themes, and certain mail preferences if you’re using an Outlook account with Microsoft 365.
To check sync settings, go to File > Options > Account Settings, and see if you’re signed into a Microsoft account. This helps Outlook remember your choices and apply them elsewhere.
But some layout tweaks remain device-specific. If you work across a laptop and phone, adjust each version to your liking. What works on a wide monitor may not fit a small screen.
Saving and Backing Up Custom Settings
Exporting Outlook Settings
If you’ve spent time setting up Outlook exactly how you want it, it makes sense to back it up. While Outlook doesn’t offer one-click export for layout, you can still save key settings like mail rules, Quick Steps, and signatures.
To export mail rules, go to File > Manage Rules & Alerts, then click Options > Export Rules. For Quick Steps, there’s no direct export tool, but some backup utilities or registry edits can capture them. Signatures are saved as files on your computer. You can copy them from this folder:
C:\Users\[YourName]\AppData\Roaming\Microsoft\Signatures
Saving these files helps restore your setup after a reinstall or PC change. It’s not a full backup, but it protects the most used parts of your layout.
Restoring Outlook Layout from Backup
If you’ve backed up rules, signatures, or registry entries for layout tweaks, restoring is simple. Import rules through Manage Rules & Alerts > Options > Import Rules. Paste your signature files back into the same folder to bring them back.
For full layout restoration, you might need IT tools or scripts. Some business environments use Group Policy or configuration tools to apply layouts for teams. If you’re a solo user, it’s worth noting which settings Outlook stores locally and which are tied to your profile.
Keeping a small list of your favorite settings helps rebuild quickly when needed. This can include ribbon commands, calendar view preference, and To-Do Bar layout. Store this info in a note or document for reference.
Troubleshooting Layout and Feature Issues
What to Do When Layout Resets Itself
Sometimes Outlook loses your layout settings after an update or crash. The reading pane might vanish, or folders could go missing. First, restart Outlook. If that doesn’t fix it, check the View tab and reset your preferred layout manually.
Outlook stores many layout preferences in the user profile. If that profile gets corrupted, it might reset to default. In some cases, creating a new Outlook profile solves layout issues. Go to Control Panel > Mail > Show Profiles to start fresh.
Avoid losing layout by closing Outlook properly and letting updates finish before restarting. Sudden shutdowns can disrupt saved settings.
Fixing Missing Tabs or Commands
If your ribbon suddenly loses tabs or buttons, it may be due to disabled add-ins or a broken profile. First, try resetting the ribbon from File > Options > Customize Ribbon > Reset. Then check add-ins from File > Options > Add-ins.
Look at the list of disabled items. If a key add-in like “Microsoft Exchange Add-in” is turned off, re-enable it. Also, try running Outlook in Safe Mode (hold Ctrl while opening it) to see if a conflicting add-in is the cause.
These steps help bring your setup back without a full reinstall. If the problem repeats, contact support or IT for help with deeper issues.
Expert Tips for Better Outlook Productivity
Keyboard Shortcuts for Custom Tasks
Learning keyboard shortcuts in Outlook can save time and boost daily output. Instead of clicking through menus, you can press a few keys to do the same thing much faster. Outlook has dozens of shortcuts, and using even a few of them regularly can change how quickly you handle your inbox.
Here are a few useful examples:
- Press Ctrl + R to reply to a message.
- Press Ctrl + Shift + M to create a new email.
- Press Ctrl + 1 to switch to Mail view, Ctrl + 2 for Calendar, and Ctrl + 3 for Contacts.
- Press Ctrl + E to search quickly within any folder.
- Use Ctrl + Shift + K to create a new task.
You can also use shortcuts to flag emails, move them to folders, or mark them as read. The key is to pick a few that match your workflow. Start with just two or three shortcuts and build from there. Keep a small printed list by your desk if needed.
Using these shortcuts consistently saves a few seconds each time. That adds up over weeks and months, making your email handling much smoother.
Tips for Creating Rules and Quick Steps
Rules and Quick Steps are tools that automate email handling. They reduce manual work like moving emails to folders, forwarding to teammates, or replying with standard messages.
To create a rule, go to File > Manage Rules & Alerts. You can set conditions like “when a message comes from X” and actions like “move to folder Y.” Rules run automatically, even if you’re not at your desk.
Quick Steps work a bit differently. They appear on the Home ribbon and run when you click them. Go to Home > Quick Steps > Create New. For example, you can make a Quick Step that marks a message as read, forwards it to your boss, and moves it to a project folder; all at once.
These tools are best when you have repeating tasks. If you sort newsletters daily or send the same replies weekly, use Quick Steps and Rules. You’ll save time and reduce errors from doing things manually.
Conclusion
Customizing Outlook helps you work the way you want. From adjusting the reading pane to organizing folders and setting up the ribbon, every change makes daily tasks faster and simpler. You don’t need to accept the default setup. Take the time to move things around, test different layouts, and fine-tune your workflow.
Features like the To-Do Bar, calendar view options, and Quick Steps aren’t just extras; they’re tools for staying on top of your work. Whether you’re replying to messages or managing tasks, Outlook can be shaped to fit your exact needs.
Start small. Change one thing, use it for a few days, and see how it feels. Then change another. Outlook has a lot to offer, but its real power comes when it’s set up for you, not someone else. You’re in control of how you work; and a well-customized Outlook is a great place to begin.
Frequently Asked Questions
How do I reset Outlook to default?
Go to File > Options > Customize Ribbon, then click Reset. You can reset a specific tab or the whole ribbon. To fully reset Outlook, you may need to create a new profile under Control Panel > Mail > Show Profiles.
Can I sync my Outlook layout across devices?
Some settings like themes and inbox preferences sync if you’re using a Microsoft 365 account. But layout items like the ribbon, To-Do Bar, or folder pane are stored locally and need to be customized separately on each device.
Where can I find custom view settings?
Click the View tab, then choose View Settings. This opens a window where you can adjust columns, grouping, sorting, and filters. These settings affect how emails appear in the list view.
What’s the best way to manage folders in Outlook?
Pin the folders you use most to Favorites, and organize them in the order you prefer. Use right-click to add or remove folders from Favorites, and drag to reorder them. Keep your main folders visible and remove clutter for faster access.
Why are my Outlook settings not saving?
This can happen if Outlook is not closing properly, or if the user profile is corrupted. Make sure Outlook exits fully before shutdown. If the issue continues, try creating a new profile via Control Panel > Mail and test again.