Create Outlook distribution list and make group emailing effortless. Instead of typing addresses one by one, or worse, forgetting someone, you can send updates, invites, or announcements to an entire group with a single click.
The best part? Outlook makes it simple to set up and manage. Whether it’s for a work team, project, or even family and friends, a distribution list keeps communication fast and organized.
In this guide, I’ll show you how to create an Outlook distribution list step by step, plus a few tips to keep it updated and effective. Ready to simplify group emails? Let’s dive in.
What is a distribution list in Outlook?
A distribution list is a single contact entry that includes multiple email addresses. When you send an email to the list, each person on that list gets the message. You don’t need to add people one by one to the “To” field. That’s the basic idea.
The term “distribution list” is mostly used in Outlook Desktop. On the web version, you might see it called a “contact list” or “group.” Don’t worry about the name; they work the same way. The main purpose is to make bulk emailing easy and consistent.
There are two main types of groups in Outlook: contact groups and Microsoft 365 groups. Contact groups are local to your Outlook profile. That means you set them up for your own use. Microsoft 365 groups are managed at an organizational level and come with shared resources like calendars and document storage.
Why use a distribution list instead of sending individual emails?
Typing out multiple addresses for each email takes time. Even with autocomplete, it’s easy to miss someone or include the wrong person. A distribution list solves that. You only need to remember one name, and Outlook does the rest.
Besides saving time, it helps with accuracy. You avoid human errors like typos or copying the wrong contact. You also make sure no one is forgotten when sending an important update or invitation.
Another benefit is consistency. If you’re sending monthly reports to a team, weekly agendas to a class, or holiday greetings to clients, using a group keeps your communication uniform. You send one message, and everyone sees the same version. No missed recipients, no confusion.
There’s also a privacy angle. By using BCC with a distribution list, you can keep individual email addresses hidden. That’s useful when privacy matters, like sending newsletters or general announcements.
Understanding the Basics of Outlook Email Groups
The difference between contact groups and distribution lists
These terms often confuse users. In Outlook, a contact group is the updated term for what many still call a distribution list. The core function remains the same: both are groups of email contacts under one name. You create it once, then reuse it anytime you want to send an email to that group.
A contact group is personal. It lives in your Outlook Contacts folder. Only you can use it, unless you choose to share it. It works well for small to mid-sized groups like teams, committees, or event attendees.
On the other hand, a Microsoft 365 group is broader. It’s stored in the cloud and used across your organization. These groups have shared inboxes, shared calendars, and more. They require admin-level setup and work best in corporate settings where more control is needed.
If you’re a typical Outlook user just looking to send group emails from your own account, you want to set up a contact group. That’s your basic distribution list. It’s simple, flexible, and doesn’t require admin help.
How Outlook processes group emails
When you send an email to a distribution list, Outlook expands the group into individual email addresses behind the scenes. That means each person gets the same message as if you had typed their email yourself. But you don’t need to worry about formatting, spacing, or including each contact. Outlook handles it.
If you send the message to the “To” field, all recipients can see who else is on the list. That’s useful in teams where open communication is okay. If privacy is a concern, you can use the “BCC” field instead. That keeps the list hidden from other recipients.
In most cases, replies to the message go only to the original sender. That’s good when you want feedback to stay private. But if you’re using a Microsoft 365 group, replies can go to everyone unless the sender changes the settings.
Group messages work just like normal emails, but they’re quicker to send and manage. The key is in how Outlook stores and recalls the group information. Once set up, your contact group appears in the autocomplete menu and acts like any other contact.
Preparation Before Creating a Distribution List
Checking your Outlook version
Before creating a distribution list, make sure you know which version of Outlook you’re using. This is important because features vary slightly between Outlook Desktop, Outlook Web, and Outlook 365. Each version has a different layout, and certain options may appear in different places or have different names.
To check your version, open Outlook and go to the “File” menu. Then select “Office Account” or “Help,” depending on your version. There, you’ll see your current Outlook edition listed; whether it’s part of Microsoft 365, Outlook 2019, 2016, or another release.
Knowing this helps you follow the correct steps. For example, in some older versions, the term “Distribution List” is used directly. In newer versions, it’s referred to as a “Contact Group.” Even though they do the same thing, the names and menus differ slightly. So knowing your version prevents confusion when following setup steps.
If you’re using Outlook on a Mac or on a browser like Chrome or Edge, your screen may look different. You may not find the same toolbar or icons. But don’t worry; all versions let you create a group; you just need to know where to click.
Also, check that your Outlook is up to date. Go to “File” > “Office Account” > “Update Options” > “Update Now.” Updated versions often have better support and improved stability. If your Outlook is outdated, you might face problems when adding members or sending group emails.
So before you start creating your distribution list, confirm your Outlook version. That small step will make the rest of the process much easier to follow.
Verifying address book access and account permissions
Before creating a distribution list, you also need to make sure Outlook can access your contacts. This may sound basic, but it’s one of the most common reasons why people can’t find names to add to their list.
Your address book should be connected to your email account. If it isn’t, Outlook won’t be able to pull up your saved contacts. To check this, go to the “People” or “Contacts” tab in your Outlook and see if your contact list appears. If it’s empty, you may need to import contacts or reconnect your account.
If you’re using a work or school email account, some features may be restricted by the administrator. In that case, you might not have permission to create a group that includes external contacts or people outside your organization. If you try to do so and get an error, that could be the reason.
Also, make sure you’re connected to the internet if you’re using a cloud-based Outlook account. Without that connection, Outlook may not be able to sync your contact list or let you create a new one.
Lastly, double-check your Outlook settings. Go to “File” > “Options” > “Mail” > “Send messages” and make sure no restrictions are blocking group email usage. Some accounts have default settings that limit group size or block list sharing.
By confirming access and permissions early, you avoid issues later during the setup process.
Step-by-Step Guide to Create Outlook Distribution List in Outlook Desktop
Accessing your Contacts folder
To start creating a distribution list in the Outlook desktop app, you first need to open your Contacts folder. This is where all your saved contact groups will live, and it’s the section used to manage personal lists.
Click the “People” icon in the lower-left corner of your Outlook screen. If you’re using an older version, it might say “Contacts” instead. Once there, you’ll see your saved contacts and any groups you’ve created before.
If it’s your first time here, the folder might look empty or have only a few entries. Don’t worry. You can still create a group from scratch. There’s usually a ribbon at the top with options like “New Contact,” “New Group,” or “New Contact Group.” This is where the process begins.
Accessing the correct folder is important because Outlook saves your new distribution list here. If you try to create one outside this folder or from your inbox, you might not see all the options you need.
Make sure you’re in the main contacts folder linked to your primary email account. If you have multiple accounts added to your Outlook, select the correct one from the left-hand panel. That ensures your group will be created under the right email address.
Once you’re in the right place, move on to creating your group.
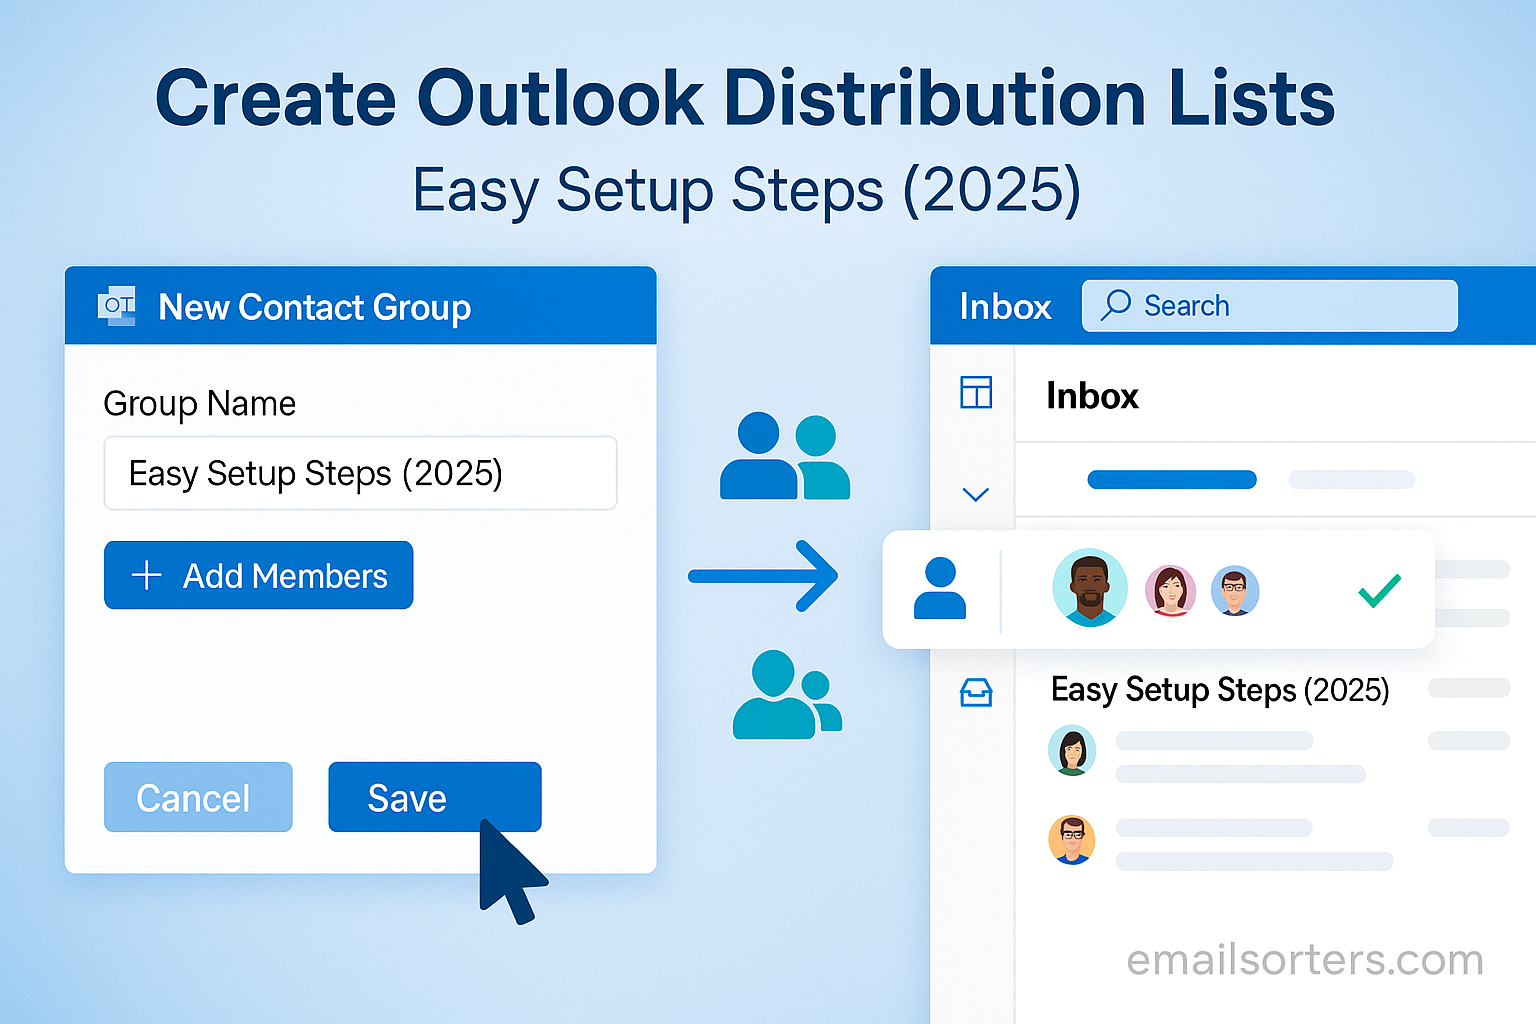
Creating a new contact group
Now that you’re in the Contacts folder, it’s time to create the group. Click “New Contact Group” from the ribbon at the top of the screen. This opens a new window where you’ll enter all the details for your distribution list.
Start by giving your group a name. Choose something simple and easy to remember. For example, “Marketing Team,” “Monthly Clients,” or “Project Alpha.” This name will appear in the “To” field when you send an email, so make it something you’ll recognize quickly.
After naming your group, click the “Add Members” button. You’ll see a few options: “From Outlook Contacts,” “From Address Book,” and “New Email Contact.” Use the one that suits your needs.
- “From Outlook Contacts” lets you select names from your saved contacts.
- “From Address Book” pulls in people from your company directory if you’re on a corporate account.
- “New Email Contact” is useful if someone isn’t saved in your Outlook yet.
Select the names you want, click “Members,” then click “OK.” The names will appear in the group window. You can add as many as you like, depending on your version and account limits.
Once your members are added, click “Save & Close” in the top-left corner. Your group is now ready to use.
Adding members from your address book or manually
Adding people to your list is easy, but the method you choose depends on where your contacts are saved. If they’re already in your Outlook Contacts or address book, you can use the built-in selection menu.
Click “Add Members,” then choose “From Outlook Contacts.” A window pops up showing your available contacts. Hold down the “Ctrl” key to select multiple names. Once selected, click “Members,” then “OK.”
If you need to add someone who’s not already saved, choose “New Email Contact” instead. A new form appears where you enter the person’s name and email address manually. After filling it out, click “OK” to add them.
You can mix and match these methods. Add a few saved contacts, then add a couple of new ones manually. Outlook handles it all the same way.
One important note: make sure you double-check spelling and addresses when typing them in manually. There’s no spell check in the group editor, so mistakes here can lead to failed deliveries later.
Once you’ve added all your members, review the list for accuracy. Remove any duplicates, correct any errors, and then save your group.
Naming and saving your distribution list
Once your group is created and filled with contacts, it’s time to give it a name and save it. The name you choose should be clear and easy to remember. Avoid using vague titles. If you create a list called “List 1,” it’ll be hard to recall what it’s for in a few weeks. A name like “Weekly Sales Team” or “Client Follow-up Group” will make more sense later.
Click the “Name” field at the top of your new contact group window. Type in the name you’ve chosen. Once you’ve entered the name and added your members, click “Save & Close” in the toolbar. Your group is now saved and stored in your Contacts folder.
From now on, any time you want to email that group, just start typing its name in the “To” field of a new message. Outlook will auto-complete it for you. Click it, write your message, and hit send.
You can always return to this list to update it. Just go to your Contacts folder, find the group, double-click it, and make changes. Then save again. The saved group updates immediately.
A named and saved list means you don’t need to start over every time you send a message. It keeps your email organized and saves time.
Creating Distribution Lists in Outlook Web (Outlook.com)
Navigating to People section
Creating a distribution list in Outlook Web is slightly different than in the desktop version. First, open Outlook in your web browser. Sign in to your account, then look for the People icon. It’s usually found on the left-hand side of the page, along with Mail, Calendar, and Tasks.
Click on the People icon. This opens a view of your contacts. From here, you can create a new contact list. You might see options labeled “New Contact” or “New Contact List.” You want to select “New Contact List.”
This section works as your address book, and everything you create here will sync with your Outlook Mail.
Using ‘New Contact List’ option
Click “New Contact List.” A panel will slide in from the right or open in the center, depending on your screen. You’ll need to give your list a name. As with the desktop version, use something that helps you remember what the group is for.
After naming your list, enter the email addresses of the people you want to add. If you’ve used Outlook before, it may autocomplete names as you type. Select each one, and they’ll be added to the list. You can type addresses directly or choose from saved contacts.
There’s also a field to add a short description. This part is optional, but useful if you want a reminder of what the list is used for.
Once all your names are in, click “Create” or “Save” at the bottom. Your list is now ready and saved under the People section.
Saving and editing your list
After creating your contact list, it will appear in the “Your Contact Lists” section. To edit it later, just click on the list name. A panel will open, showing the members. From here, you can add or remove people, change the name, or delete the list entirely.
Changes are saved automatically or with a “Save” button, depending on your version. These changes sync across your web and mobile apps if you’re signed in to the same Microsoft account.
If you want to use this list to send emails, go to your inbox, click “New Message,” and start typing the list name in the “To” field. Outlook Web will suggest your saved lists. Select it, write your email, and send.
The web version is straightforward and accessible from any device with internet access. It’s a good option for users who don’t always use the Outlook desktop client.
Editing and Managing Distribution Lists
Adding or removing members
To edit a distribution list, go to your Contacts or People section, depending on whether you’re using the desktop or web version. Locate the group you want to edit and double-click it.
Once the group window opens, you’ll see the current list of members. To remove someone, click their name and press “Remove Member” or hit the Delete key. To add new people, click “Add Members,” and choose how you want to add them: from Outlook Contacts, the address book, or by typing a new email address.
After you make changes, always click “Save & Close” or “Save” to confirm them. If you forget to save, your updates will be lost. Outlook won’t give you a second warning.
You can do this as often as needed. Whether someone leaves the team, a client unsubscribes, or you get new people to add, it’s easy to keep your list up to date.
Renaming or deleting a list
If you want to rename your group, open the distribution list and change the name at the top. Then save. This changes how it appears in your contact folder and in the “To” field when composing emails.
To delete a list, right-click the group name in your Contacts folder and select “Delete.” If you’re on the web, click the list, then choose the delete icon. Outlook may ask for confirmation. Once deleted, the list can’t be recovered unless you recreate it.
Always double-check before deleting. If you’re unsure whether you’ll need it later, consider exporting or copying the list into a note for future use.
Keeping your lists clean and updated avoids confusion and helps your communication stay on point.
Sending Emails Using Your Distribution List
Composing messages with your list in the “To” field
Now that your distribution list is ready, using it to send messages is simple. Open a new email and click on the “To” field. Start typing the name of your list. Outlook will suggest it automatically. Select it, write your subject and message, then click “Send.”
Every person in the list will receive your email as if you’d typed their address manually. The email behaves just like any other, except you didn’t spend time entering dozens of names.
You can use your distribution list in the “To,” “CC,” or “BCC” fields. Just treat it like any individual contact. This makes it fast and flexible.
Using BCC for privacy
If your group includes people who don’t know each other, or if privacy is important, use the “BCC” field instead of “To” or “CC.” This hides all recipients from each other. Each person sees only their own name and doesn’t know who else got the email.
To do this, click “Options” in your new email window, then choose “Show BCC.” Add your distribution list in the BCC field, and you’re done. This is useful for newsletters, announcements, or any situation where recipient privacy matters.
Sending emails using a distribution list works like any other message. The difference is how much faster and cleaner it becomes with the list already in place.
Troubleshooting Common Problems
List not appearing in autocomplete
Sometimes, your distribution list might not show up when you start typing its name in the “To” field. This can happen for several reasons. One common cause is that Outlook’s autocomplete cache doesn’t have the list saved yet. This doesn’t mean the list is gone; it just means Outlook isn’t suggesting it.
To fix this, go to your Contacts section, find your list, and open it. Then close it again. This refreshes its visibility. Next time you type the list name, Outlook should suggest it.
Another option is to manually type the full name of the group. Once you send the email, Outlook will remember it for future use. You can also delete and re-create the list if the problem continues, but that’s usually a last resort.
Members not receiving emails
If people on your list say they didn’t get your message, double-check the email addresses in the group. A typo or outdated address is the most common cause. Go back to the group, open it, and review each entry.
Also, ask recipients to check their spam or junk folders. Sometimes, group messages get flagged, especially if sent from new or rarely used addresses.
If everything looks correct, try sending a simple test email to the list. If it fails again, remove and re-add a few members to refresh the list. Sometimes the group file becomes corrupted and needs resetting.
Keeping your contact list clean and updated prevents most delivery issues.
Syncing Distribution Lists Across Devices
How syncing works with Outlook apps
If you’re using the same Microsoft account on multiple devices, your contact groups should sync automatically. That includes the Outlook desktop app, mobile apps, and web version. Any changes you make; adding or removing members, renaming lists; should appear across all devices within a few minutes.
To ensure syncing works smoothly, keep your apps updated. Check for updates regularly in the App Store, Play Store, or Microsoft 365.
If you notice missing changes, force a sync. On mobile, open the Outlook app, go to Settings, and select “Sync Contacts.” On desktop, restart the app to refresh the contact cache.
Ensuring changes reflect on mobile and desktop
When you make changes to a distribution list on desktop, give Outlook a few minutes to process the update. Then check your phone or web version to see if the change is reflected. If not, try logging out and back in or restarting the app.
If syncing continues to fail, remove the Outlook account from your device and re-add it. This often clears up sync issues.
Having your lists synced means you can manage and use them no matter where you are. Whether you’re sending emails from your phone on the go or updating your list from your desktop, the changes stay consistent.
Tips for Keeping Your Distribution Lists Organized
Labeling and categorizing groups
Over time, you may create multiple lists for different needs; team updates, event invites, client follow-ups. Without labels or categories, it’s easy to mix them up.
Give each list a clear, unique name. Use a consistent format, like “Team – Sales,” “Clients – Q3,” or “Volunteers – 2025 Event.” This keeps things organized.
In the desktop version, you can categorize your contact lists with color labels. Right-click the list, select “Categorize,” and choose a color. This helps you visually separate work from personal groups or urgent from non-urgent ones.
Periodic review and updates
Set a reminder to review your lists monthly or quarterly. People change roles, leave organizations, or switch emails. Keeping your groups current ensures your messages reach the right audience.
During your review, remove outdated contacts, fix typos, and add any new recipients. It only takes a few minutes but saves you from future email mishaps.
Outlook doesn’t clean lists automatically; you’re in charge. So take the time to keep your communication sharp.
Sharing Distribution Lists with Others
Sending contact lists by email
If you’ve created a useful group and someone else in your organization wants to use it, you can share it. In Outlook desktop, open your list and choose “Forward Contact > As Outlook Contact.” This sends the group as a .msg file attachment.
The recipient can open the attachment and save the group to their own Outlook. It’s quick and keeps formatting intact.
Avoid just copying and pasting the email addresses. Sharing the actual group file is cleaner and more reliable.
Importing shared lists into your Outlook
When you receive a shared list by email, open the .msg file. Then click “Save & Close.” The group is now part of your contacts and ready to use.
If the sender gave you a text list instead, you’ll need to manually create a new group and paste the emails in. This works, but takes more effort and leaves room for mistakes.
The best way to share is through the built-in contact forwarding option.
Outlook 365 vs Outlook Desktop: Differences in Group Features
Creating groups in Microsoft 365 admin center
In business settings, administrators can create groups that apply across the company. These Microsoft 365 Groups offer more than just email; they also come with shared inboxes, calendars, and files.
Admins use the Microsoft 365 admin center to set them up. Regular users can’t create these unless granted permission.
These groups are ideal for departments, projects, or long-term teams. If you’re managing a company email structure, this setup gives more control.
Permissions and admin control
With Microsoft 365 Groups, admins control who can send to the group, who can join or leave, and how emails are handled. It’s different from personal contact groups, which are private to the creator.
Choose the right type based on your needs. If you’re managing small personal groups, stick to contact lists. For broader organizational use, ask your IT team to help with Microsoft 365 Groups.
Best Practices for Using Distribution Lists in Professional Settings
Avoiding spam and managing replies
Using lists for group communication is helpful, but you need to manage how replies are handled. If every reply goes to everyone on the list, inboxes can get flooded.
Encourage people to reply directly to you instead of the group. Or use BCC to prevent group replies altogether.
Be cautious with attachments or links when emailing large groups. These can trigger spam filters or slow down delivery.
Always test your message before sending to large audiences. Mistakes are harder to correct once they’re out.
When to use distribution lists versus dynamic groups
Distribution lists are static. You control who’s in or out. Dynamic groups, often found in Microsoft 365 setups, update automatically based on rules; like job titles or departments.
If your group is always changing, a dynamic group may save time. But for most users, static contact groups work best.
Use what fits your needs. Distribution lists are perfect for personal, repeat-use messaging.
Alternatives to Distribution Lists in Outlook
Microsoft 365 Groups vs Contact Groups
Microsoft 365 Groups offer more tools but require admin setup. Contact groups are easier and more personal. They don’t sync shared calendars or files, but for basic email use, they work fine.
If you’re not managing company-wide communication, contact groups are simpler and quicker.
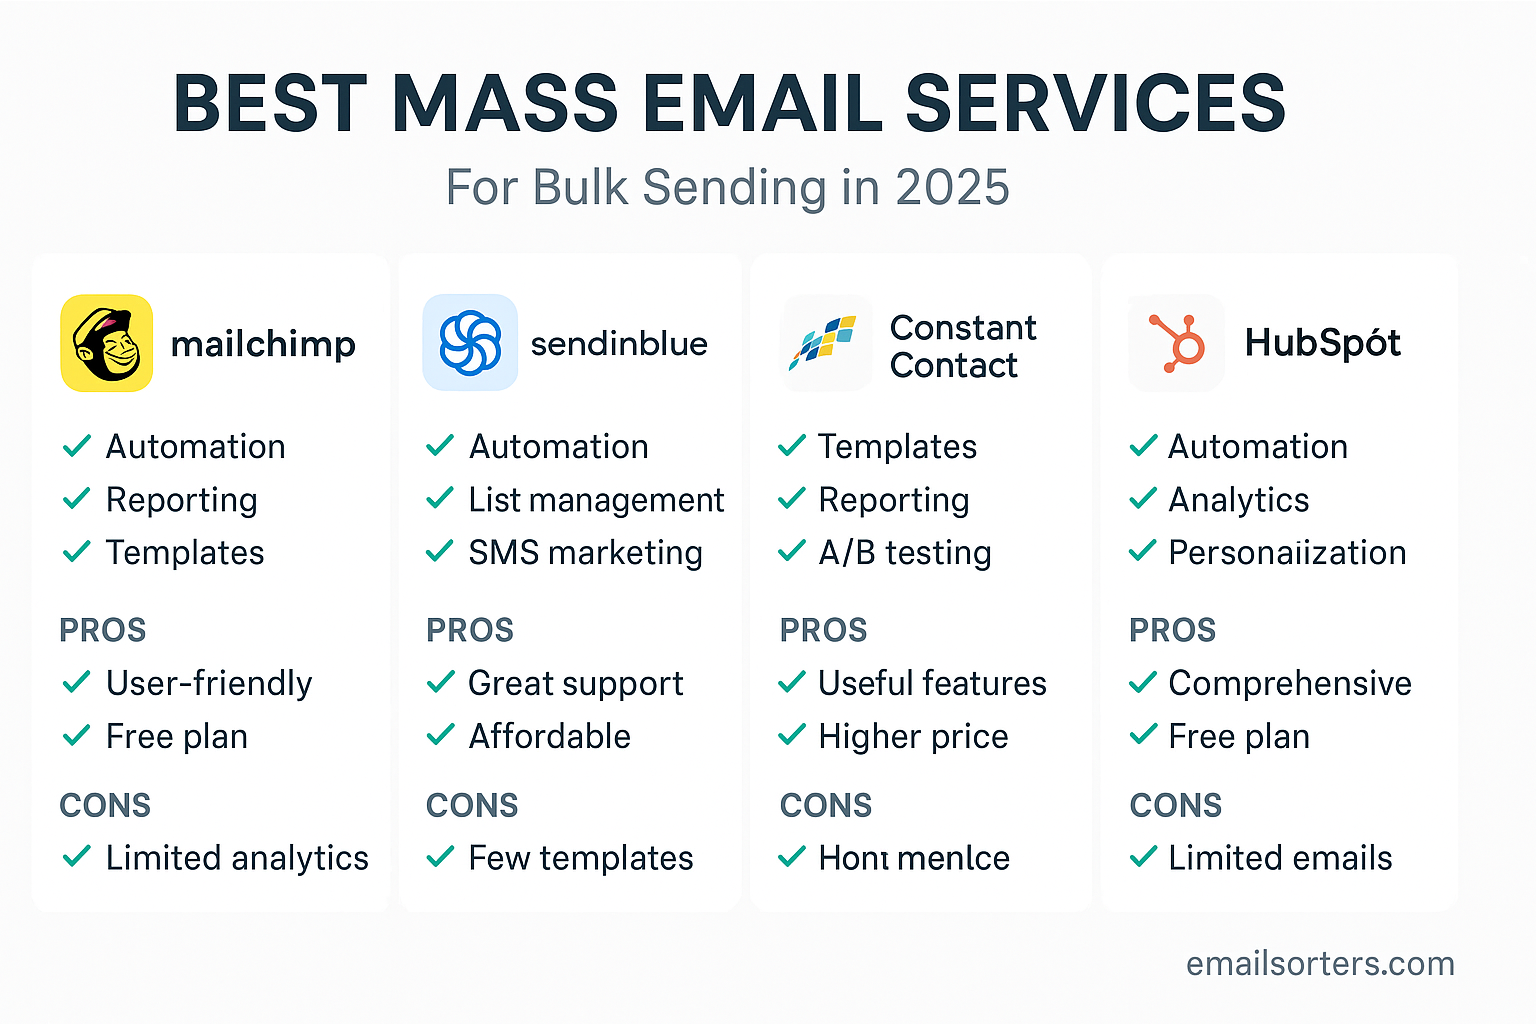
External tools for managing bulk email
If your list gets large or your emails look like newsletters, consider using tools built for mass mailing. Services like Mailchimp or Constant Contact handle bigger lists better and reduce the chance of emails being flagged.
Outlook is great for small and mid-sized groups, but not ideal for thousands of recipients or heavy campaigns.
Security and Privacy Concerns
Managing who can email the group
In corporate settings, you might want to control who can send messages to your list. In Microsoft 365, admins can set restrictions so only specific people can email certain groups.
For personal lists, it’s up to you to keep the group private. Avoid forwarding it to people you don’t trust.
Preventing misuse of lists
Never share your list publicly. Don’t post it online or in shared documents unless needed. If someone misuses the list to spam others, it reflects poorly on you.
Also, respect privacy. Use BCC when needed and don’t expose emails to people who shouldn’t see them.
Conclusion
Creating a distribution list in Outlook makes email easier. Whether you’re managing a team, sending client updates, or organizing events, these lists keep your communication fast and focused. They reduce mistakes, save time, and help you stay organized. Use the right type of list for your needs, update it often, and follow best practices for privacy. Outlook gives you the tools; it’s up to you to make the most of them.
FAQs
Can I use distribution lists with shared mailboxes?
Yes, but you may need permission. If you have access to the shared mailbox’s contact list, you can create and use a group from there.
Is there a limit to how many members can be in one list?
Yes. Outlook limits vary depending on your version and email provider. For most users, the limit is between 100 to 500 members per list.
Can I convert a distribution list into a Microsoft 365 group?
Not directly. You’ll need to recreate the group in the Microsoft 365 admin center with similar members and settings.
Will members know who else is in the list?
If you send your email using the “To” or “CC” fields, yes. To hide this, use the “BCC” field when sending.
How often should I update my distribution lists?
Check your lists at least once per month. Remove outdated contacts and add new ones as needed.