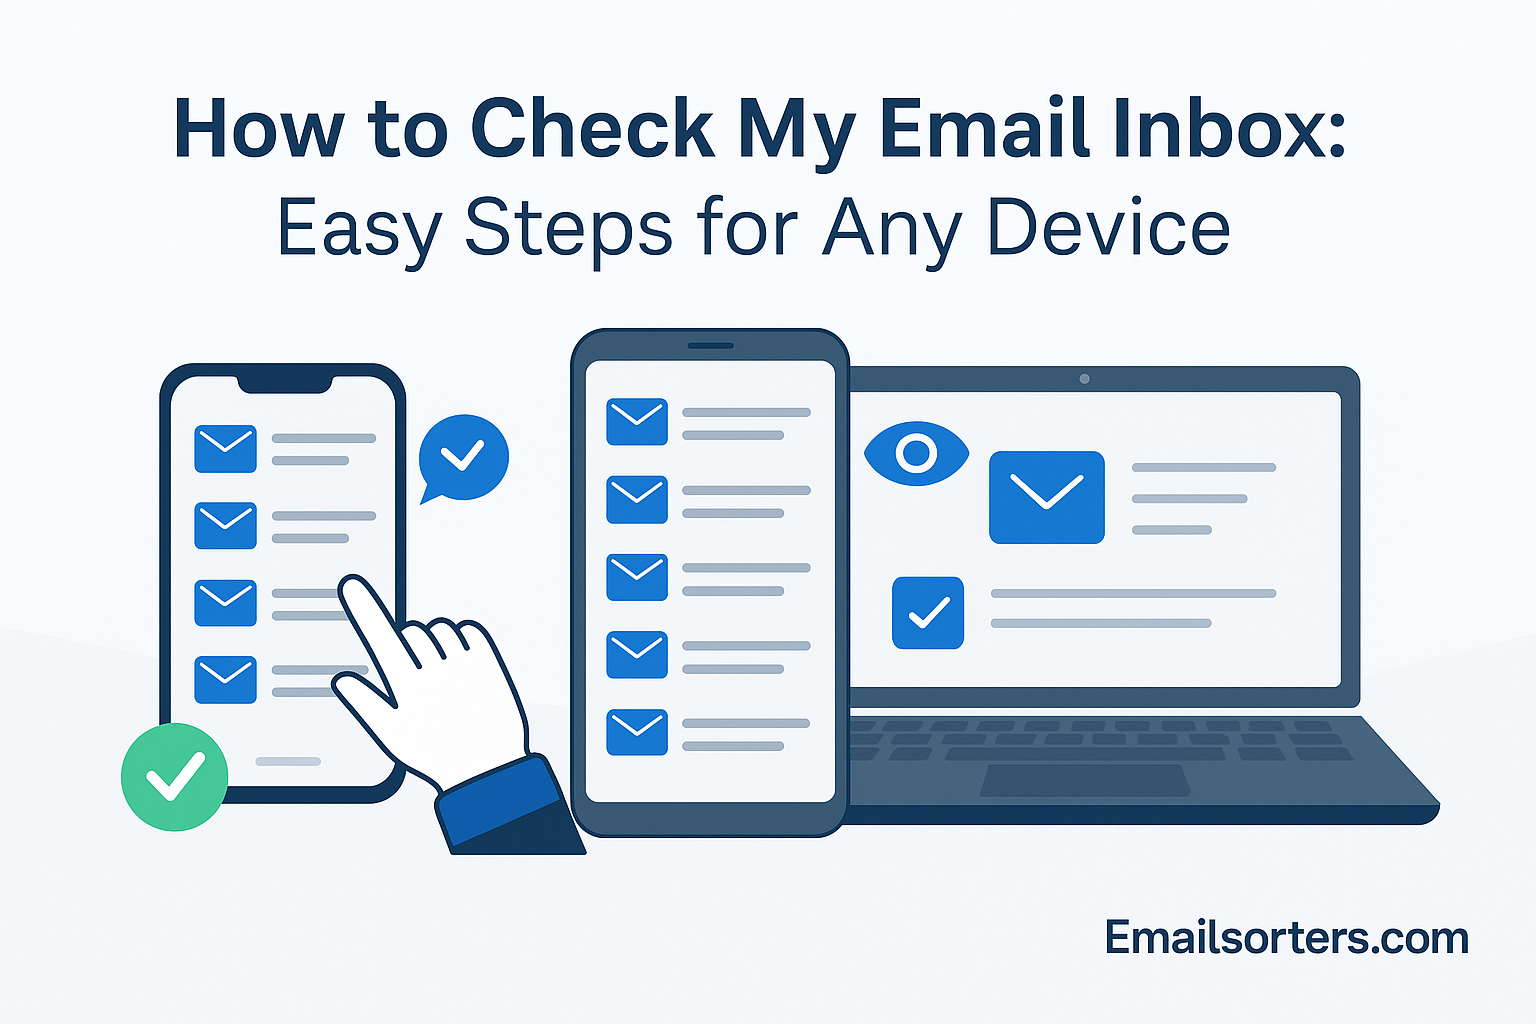
Checking the email inbox has become a daily routine. Whether you’re replying to work updates, organizing event invites, or clearing out promotional clutter, email is the lifeline of modern communication. And we do it from everywhere, phones, laptops, smartwatches, you name it.
Why does easy access matter so much? Because in our fast-paced world, quick and seamless inbox access isn’t just a convenience , it’s a necessity. Missed messages can mean lost opportunities. A cluttered inbox? That’s a productivity killer.
In this guide, you’ll learn how to check your email inbox from any device, smartphone, laptop, smartwatch, or browser. We’ll also walk through organizing your inbox, staying secure, and solving common email problems. Let’s dive in and master your inbox together.
How to Check Email on Any Device – Step-by-Step
Checking your email should be simple, whether you’re using a phone, laptop, smartwatch, or shared computer. Each device offers a slightly different way to access your inbox, but the process is quick once you know where to start. This guide walks you through exactly how to check your email on any device, clearly and step by step, so you can stay connected, reply faster, and never miss an important message.
On a Smartphone (iPhone & Android)
Smartphones are the most common way to check emails on the go. Whether you’re an iPhone loyalist or an Android enthusiast, accessing your inbox is just a few taps away.
Start by opening your email app. For most users, it’s Gmail, Apple Mail, or Outlook. These apps come pre-installed or are easily downloadable from the App Store or Google Play. Once opened, enter your email address and password. If you use two-factor authentication (which we highly recommend), you’ll need to verify your identity.
After logging in, you’ll be directed to your inbox. Here, your recent emails will be listed by date or priority, depending on your settings. Simply tap on any email to read it. If you receive many emails daily, swipe gestures let you archive, delete, or mark them as read/unread.
Want to stay constantly updated? Enable notifications within your email app settings. This way, you’ll receive alerts the moment a new email lands in your inbox. And if you juggle multiple email addresses — say, one for work and one personal, most apps allow you to add multiple accounts and easily switch between them.
So, whether you’re commuting or standing in line for coffee, your email is just a tap away.
On a Desktop or Laptop
For many professionals, desktops or laptops are still the go-to for handling emails, especially when it comes to detailed responses or attachments.
Begin by deciding how you want to access your email: through a dedicated email client or a web browser. Email clients like Microsoft Outlook, Mozilla Thunderbird, or Apple Mail offer features such as offline access, email rules, and integration with calendars. If you’re using a client, configure your account using IMAP or POP. IMAP is preferred as it syncs across devices, while POP downloads and stores emails locally.
Once configured, your inbox will appear in the left-side panel. You can click on any folder — Inbox, Sent, Spam, to view those messages. Need to find something quickly? Use the search bar to locate emails by sender or keyword.
Email clients also allow you to organize messages into folders. Create folders like “Work,” “Personal,” or “Bills” to categorize your emails. Some clients even allow color-coded tags for visual sorting.
On a Web Browser (Chrome, Safari, Edge)
Web browsers are perhaps the easiest way to check email without downloading any apps. Perfect for when you’re on a shared computer or don’t want to install anything.
Open your browser — Chrome, Safari, Firefox, or Edge — and type in your email provider’s URL. Common ones include gmail.com, outlook.com, or mail.yahoo.com. Click enter, and the login page will load.
Enter your email address and password. If two-factor authentication is enabled, you’ll receive a prompt on your phone or another device to confirm access. Once logged in, your inbox usually loads automatically. If not, click on the “Inbox” tab in the sidebar or main dashboard.
Web-based inboxes often include options like search filters, star or flag emails, and sorting by date or sender. It’s a good idea to bookmark this page in your browser for faster access in the future. You can even set it as your homepage if you check your inbox frequently.
Web access is perfect when you’re borrowing a device or at a library or internet café — just remember to log out afterward for security.
On a Chromebook
Chromebooks are built around Google services, making Gmail access seamless. If you’re using a Chromebook, you’re likely already signed into a Google account, meaning your Gmail inbox is just one click away.
From the launcher, open the Gmail app if it’s installed. If not, simply open the Chrome browser and go to gmail.com. You’ll usually be signed in automatically. If not, enter your email and password.
Since Chromebooks are cloud-centric, they’re perfect for syncing with Google Workspace or IMAP-based accounts. You can switch between multiple accounts, view attachments, and even use extensions for better productivity.
You can also use third-party email apps from the Google Play Store if you prefer something beyond Gmail. Just make sure your email service supports IMAP or POP for proper syncing.
On a Smartwatch (Apple Watch, Wear OS)
Smartwatches bring email access right to your wrist, no phone required. Ideal for quick glances and fast replies when you’re out and about.
To get started, install a compatible email app like Gmail, Outlook, or the default Mail app from your watch’s app store. On an Apple Watch, this means using the Watch app on your iPhone to sync. For Wear OS, go to the Google Play Store on your watch.
Once installed, sync your email account through the app’s settings. You’ll need to log in on your phone first, and then your watch mirrors that access. Notifications will start appearing on your watch, allowing you to preview subject lines and message snippets instantly.
Some apps allow limited interactions — such as archiving, marking as read, or even short replies using voice dictation or quick reply templates. This is especially handy during meetings, workouts, or errands when pulling out your phone isn’t convenient.
With a smartwatch, staying on top of email becomes effortless and discreet.
Bonus: How to Keep Your Inbox Organized
A cluttered inbox doesn’t just look messy — it makes it harder to stay productive and can even cause you to miss important emails. With so many messages arriving every day, it’s worth using the tools your email provider already offers to help keep things under control.
Use Inbox Management Tools
Modern inboxes can quickly spiral out of control. With hundreds of emails landing each week, it’s easy to miss something important. That’s why email providers have built-in tools to help you stay on top of what matters most.
If you use Gmail, you’ve probably seen the Priority Inbox feature. It automatically categorizes your emails based on what you frequently open or respond to. This means newsletters, receipts, and promotional clutter move to the bottom, while emails from your boss or clients stay at the top. Want more control? You can fine-tune how Gmail decides what’s important.
In Outlook, the Focused Inbox splits your messages into “Focused” and “Other.” Emails from frequent contacts or flagged messages go to Focused. Everything else, including ads or mailing lists — goes to Others. It’s not always perfect, but it learns as you go.
Yahoo Mail offers Smart Views, which automatically group your messages into categories like “Social,” “Travel,” or “Purchases.” It’s a helpful way to find what you need quickly without manually sorting emails.
These inbox management tools can drastically cut down on time spent searching for messages or deleting spam. If you’re interested in more productivity tips like these, check out our email productivity guide.
Apply Labels, Filters, and Rules
Labels, filters, and rules aren’t just fancy features — they’re your digital filing system. Once you set them up, they automatically organize your emails, so you don’t have to.
In Gmail, you can create labels like “Invoices,” “Clients,” or “School.” These labels act like folders but with a twist: a single email can carry multiple labels. For example, an invoice from a client could be labeled both “Invoices” and “Clients.”
To automate this process, use Gmail’s Filters. Go into settings, then “Filters and Blocked Addresses.” Create a new filter by entering a sender, keyword, or subject. Once defined, you can tell Gmail to automatically apply a label, mark it as read, archive it, or even forward it to another email.
Outlook users have something similar called Rules. In Outlook settings, you can create a rule to move emails to specific folders based on subject, sender, or content. These rules can also flag messages or assign categories.
This kind of automation saves time and ensures nothing important slips through the cracks. It also helps reduce inbox stress by removing clutter before it reaches your attention.
Avoid Spam and Phishing
Spam and phishing emails are more than just annoyances — they can be dangerous. From fake bank alerts to disguised malware links, your inbox is often the front line of cybersecurity.
Start by checking the sender’s email address. Even if the name looks familiar, tap or hover to see the actual email. A scam email might say it’s from “Amazon,” but the email address could be something like “info@amaz0n.support.”
Next, avoid clicking suspicious links or downloading unknown attachments. If you’re not expecting a file or the message feels off, trust your gut. Most email apps now display warnings for potential phishing attempts — don’t ignore them.
Enable two-factor authentication (2FA) on all your email accounts. Whether it’s a text message or an authenticator app, this extra step makes it far harder for hackers to break in.
Email providers also offer advanced tools: Gmail has strong spam detection powered by AI, while Proton Mail’s PhishGuard adds another layer of phishing protection. Stay alert and proactive, and you’ll avoid 99% of email-related risks.
For more tips on staying safe online, explore our email security section.
Back Up Important Emails
You never know when you’ll need to recover a lost invoice or relive a heartwarming message from a loved one. That’s why backing up your important emails is crucial.
If you use Gmail, head over to Google Takeout. From there, select the data you want to download — including all or selected email folders. You can export them as .MBOX files, which are compatible with most email apps.
For Outlook, use the Export feature to create a .PST file. This file contains all your emails, calendar entries, and contacts. Store it on an external hard drive or secure cloud storage like OneDrive.
Attachments can also be backed up separately. Download important documents or photos and save them to Google Drive, Dropbox, or iCloud. That way, even if something happens to your inbox, you still have the files.
Email providers rarely lose data, but accidents happen — especially with account breaches or app malfunctions. Regular backups give you peace of mind.
Use Clean-Up Tools (e.g., Clean Email, Unroll.Me)
Let’s face it — nobody has time to scroll through thousands of old emails. That’s where clean-up tools come in handy.
Clean Email is a popular service that helps you group emails by sender, subject, or age. You can then delete, archive, or label them in bulk. It also suggests subscriptions to cancel and spam emails to block.
Unroll.Me works a bit differently. It scans your inbox for mailing lists and newsletters, then gives you three choices: keep in inbox, roll up (digest format), or unsubscribe. It’s a simple way to declutter your inbox without missing updates from your favorite brands.
These tools are especially helpful if you’re starting fresh with inbox organization. With just a few clicks, you can eliminate years of buildup and finally reach “Inbox Zero.”
Want more clean-up strategies? Visit our guide on inbox decluttering tools.
Common Problems (And Fixes) When Checking Email
Even with reliable email providers, things can sometimes go wrong. Whether you’re locked out of your account, not receiving messages, or dealing with a buggy app, these common issues usually have simple fixes. Here’s how to troubleshoot and get back into your inbox fast.
Can’t Log In to Email?
One of the most common issues people face is being unable to log into their email account. Whether it’s forgetting your password or dealing with a hacked account, it’s frustrating — but fixable.
Start with the basics: double-check that you’ve entered your email address and password correctly. Typos, extra spaces, or a forgotten caps lock can trip you up. Still can’t get in? Click on the “Forgot Password” link on your provider’s login page. Both Gmail and Outlook have simple recovery flows where you can reset your password using a backup email, phone number, or security questions.
If your account is locked due to suspicious activity, follow the steps provided in the alert message or visit your provider’s help center. For example, Gmail might require identity verification before unlocking the account.
In cases of a hacked email, act fast. Log in from a secure device, change your password, and review recent activity to spot any unauthorized access. Enable two-factor authentication for added security moving forward.
Your email provider’s support team is also just a click away if you’re stuck. Most platforms have 24/7 help options for recovering accounts.
Not Receiving Emails?
You’re waiting for an important email — maybe a job offer or a delivery confirmation — but it never arrives. What gives?
First, check your Spam or Junk folders. Email filters sometimes mislabel messages, especially from unfamiliar senders. If you find the missing email there, mark it as “Not Spam” so future messages land in your inbox.
Next, check your sync settings if you’re using an email app. Go into your email app’s settings and make sure your account is syncing automatically. Some apps pause sync to save battery or data, especially on mobile devices.
Storage space is another issue. If your mailbox is full, new emails can’t come in. Delete old messages or large attachments to free up space. Most email services display your storage usage in the settings area.
Still not working? Ask the sender to verify they used the correct address. You can also try sending yourself a test message to see if it arrives. If not, contact your email provider’s support team.
For more help, check out our troubleshooting page on email delivery issues.
Email App Not Working?
When your email app refuses to load or keeps crashing, don’t panic. Here’s how to troubleshoot and get back online fast.
Start by restarting your device. It’s the classic fix, but it often works. Next, try reinstalling the app. Delete it from your phone, then head to the App Store or Google Play to download it again. This gives you a fresh start and often resolves bugs or corrupted files.
If you’re on Android, try clearing the app’s cache. Go to Settings > Apps > Your Email App > Storage, then tap “Clear Cache.” This removes temporary files that might be interfering with performance.
Another thing to check is your internet connection. Slow or unstable Wi-Fi can prevent emails from loading. Switch to a different network or try using mobile data to rule out connection problems.
Finally, make sure your app and operating system are up to date. App developers release patches to fix bugs regularly. Keeping everything updated helps avoid compatibility issues.
If all else fails, you can always access your inbox through a web browser while you sort out app issues.
FAQs – How to Check Your Email Inbox
How do I go to my Gmail inbox?
To access your Gmail inbox:
- Open your web browser and go to www.gmail.com.
- Enter your Google account email address and click “Next.”
- Enter your password and click “Next” again to log in.
- Once you’re signed in, Gmail will automatically load your Inbox.
- If not, click “Inbox” on the left-hand sidebar to view your messages.
Tip: You can bookmark Gmail on your browser for quicker access in the future. Gmail also works well with apps like Apple Mail, Outlook, or any email app that supports IMAP.
How do I check my Hotmail or Outlook email?
To check your Hotmail or Outlook email:
- Go to www.outlook.com.
- Enter your Hotmail, Live, or Outlook email address and click “Next.”
- Enter your password and log in.
- Once you’re signed in, Outlook will take you directly to your inbox.
Outlook also has dedicated apps for Windows, macOS, iOS, and Android. You can also add your Outlook account to third-party apps like Thunderbird or Apple Mail using IMAP settings.
How do I check my email on my phone?
Checking your email on a smartphone is simple:
- Open your preferred email app (e.g., Gmail, Apple Mail, Outlook).
- If it’s your first time, follow the prompts to add your email account by entering your email address and password.
- Once signed in, your app will automatically sync your inbox.
- Tap on the Inbox tab or icon to view new emails.
Most email apps support multiple accounts, so you can manage work and personal inboxes in one place. Enable notifications if you want real-time alerts for new messages.
When should I check my email?
There’s no one-size-fits-all answer, but here are some best practices:
- Check 2 to 3 times per day (morning, midday, and late afternoon) to stay informed without becoming distracted.
- Avoid constantly checking your inbox—this reduces productivity and increases stress.
- Set aside dedicated email times during the day if possible.
For professionals, using tools like inbox scheduling or Do Not Disturb modes can help manage email flow more effectively.
How do I log in to my email account?
Here’s how to log in to your email account on any platform:
- Via Browser:
- Go to your provider’s login page (e.g., gmail.com, outlook.com, yahoo.com).
- Enter your email address and click “Next” or “Continue.”
- Enter your password and click “Log In” or “Sign In.”
- You’ll be taken directly to your inbox.
- Via Mobile App:
- Open your email app (Gmail, Outlook, Apple Mail, etc.).
- Tap “Add Account” if needed.
- Enter your credentials and tap Sign In.
- Via Desktop App:
- Open your email client (e.g., Outlook, Thunderbird).
- Set up the account with your email, password, and mail server settings if prompted (IMAP/SMTP).
If you forget your password, most providers offer a “Forgot Password” link to reset your credentials via phone or alternate email verification.